Worked Examples: Different OpenMS Methods to Achieve the Same Outcome#
The following tutorials provide the opportunity to complete a real-world example while also seeing the different methods OpenMS makes available to complete the same task.
There are four ways to use OpenMS to complete a task. For example, say you want to read a file and store the information in an output file. You can do this by:
Using TOPP shell to run a shell script or execute a command directly.
Using pyOpenMS and creating and running a python script.
Using TOPPView, a graphical user interface provided by OpenMS.
Constructing a workflow in KNIME, which can be saved and executed on multiple input files.
Running a script using Nextflow, a language based on the Groovy programming language.
The following sections explain how to read a file and store the information in an output file using these five different methods.
Using TOPP shell#
As explained in the command-line quick start guide, TOPP shell is available for those who are comfortable with executing command line tools and writing scripts.
To read the information of a file, just type the following in the command line and press Enter.
FileInfo -in <insert input file> -out <insert output file>
You can also copy and paste this into a shell script (file with an .sh extension), and then type bash
Using pyOpenMS#
You can replicate the functionality of the FileInfo TOPP tool in pyOpenMS, using one of the following examples, depending on the type of file you want to get information about.
Example for
mzMLfilefrom pyopenms import * exp = MSExperiment() MzMLFile().load("sample.mzML", exp) exp.updateRanges() ms_levels = exp.getMSLevels() num_spectra = {level: 0 for level in ms_levels} for spec in exp: num_spectra[spec.getMSLevel()] += 1 print("Instrument:") for analyzer in exp.getInstrument().getMassAnalyzers(): print(f"\tMass Analyzer: {analyzer.getType()} (resolution: {analyzer.getResolution()})") print("\nMS levels: "+", ".join([str(level) for level in ms_levels])) print(f"Total number of peaks: {sum([spec.size() for spec in exp])}") print(f"Total number of spectra: {exp.size()}") print("\nRanges:") print(f"\tretention time: {exp.getMinRT()} .. {exp.getMaxRT()} ({round((exp.getMaxRT()-exp.getMinRT())/60, 2)} min)") print(f"\tmass-to-charge: {exp.getMinMZ()} .. {exp.getMaxMZ()}") print(f"\tintensity: {exp.getMinIntensity()} .. {exp.getMaxIntensity()}") print("\nNumber of spectra per MS level:") for level, number in num_spectra.items(): print(f"\tlevel {level}: {number}")
Example for
featureXMLfile
feature_map = FeatureMap()
FeatureXMLFile().load("sample.featureXML", feature_map)

charges = {}
number_of_ids = {}
tic = 0

for feature in feature_map:
   charge = feature.getCharge()
   if charge in charges.keys():
       charges[charge] += 1
   else:
       charges[charge] = 1
   num_ids = len(feature.getPeptideIdentifications())
   if num_ids in number_of_ids.keys():
       number_of_ids[num_ids] += 1
   else:
       number_of_ids[num_ids] = 1
   tic += feature.getIntensity()

print(f"Number of features: {feature_map.size()}")

print("\nRanges:")
print(f"\tretention time: {feature_map.getMinRT()} .. {feature_map.getMaxRT()} ({round((feature_map.getMaxRT()-feature_map.getMinRT())/60, 2)} min)")
print(f"\tmass-to-charge: {feature_map.getMinMZ()} .. {feature_map.getMaxMZ()}")
print(f"\tintensity: {feature_map.getMinIntensity()} .. {feature_map.getMaxIntensity()}")

print(f"\nTotal ion current in features: {int(tic)}")

print("\nCharge distribution:")
for charge, occurence in charges.items():
   print(f"\tcharge {charge}: {occurence}x")

print("\nDistribution of peptide identifications (IDs) per feature:")
for num_ids, occurence in number_of_ids.items():
   print(f"\t{num_ids} IDs: {occurence}")

print(f"\nUnassigned peptide identifications: {len(feature_map.getUnassignedPeptideIdentifications())}")
Using TOPPView#
If you want a graphical user interface to interact with, then use TOPPView. Follow these steps to read the file information using TOPPView:
Go to File > Open file and open a file by following the prompts.
Go to Tools > Apply TOPP tool (whole layer).
Set TOPP tool to FileInfo and output argument to out.
Load an existing INI file by clicking Load and selecting an INI file from the file importer. If you don’t have an INI file, click Store, enter a file name and click OK to generate an INI file, then click Load and load the file.
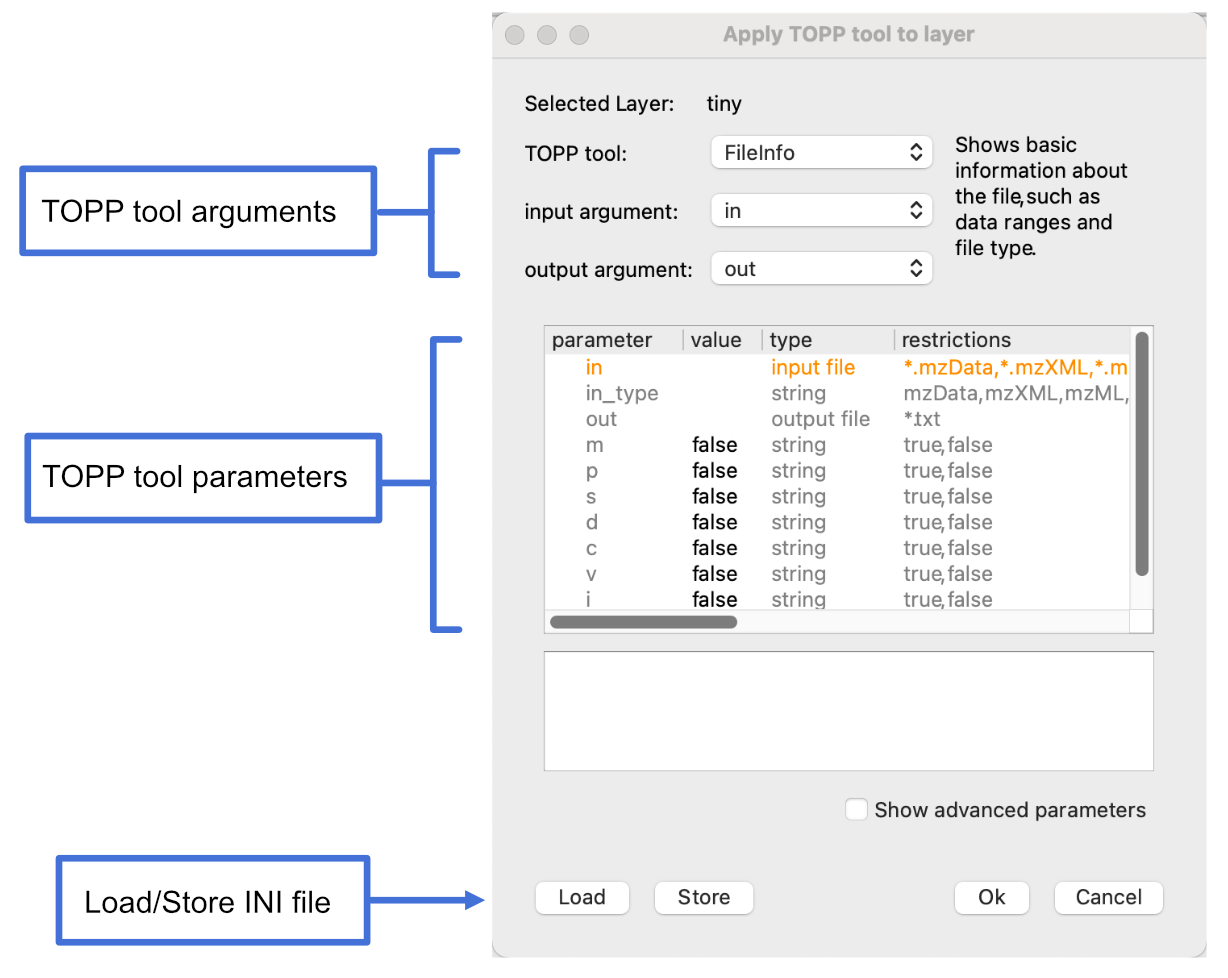
Click OK.
Open the Log panel at the bottom of the screen to view the resulting file information.
Constructing a workflow in KNIME#
KNIME is available for those who want a graphical user interface to create and use workflows. Here is an example of how to report file information on an input file to an output file using KNIME.
1. Install OpenMS plugin.
- Go to File > Install KNIME Extensions.
- Search for OpenMS.
- Select the checkbox next to OpenMS and click Next.
- Click Next.
- Accept the terms of conditions.
- Restart KNIME
2. Open a new file by going to File > New file.
3. Construct workflow by adding nodes.
- Go to the Node repository
- In the search field, type Input File. You should see an Input File node in the filtered list.
- Drag and drop the Input File node from the Node repository into the workspace.
- Repeat steps b and c for the FileInfo node and the Output File node.
- Connect the Input File node to the FileInfo node. Connect the FileInfo node to the Output File node. Your workflow should look like this:
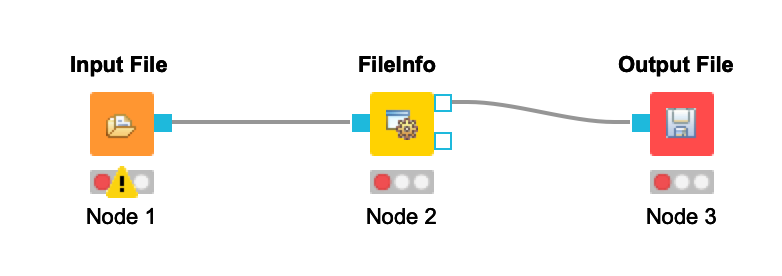 Once you configure your nodes in the next step, the warnings should disappear.
4. Configure the nodes in workflow.
- Right-click the Input File node and select Configure.
- Click Browse and choose the appropriate file from the file importer.
- Click OK.
- Right-click the Output File node and select Configure.
- Either choose an existing file or enter the file name of the new file. If you choose an existing file, select the Overwrite file(s) if it/they exist checkbox.
- Click OK.
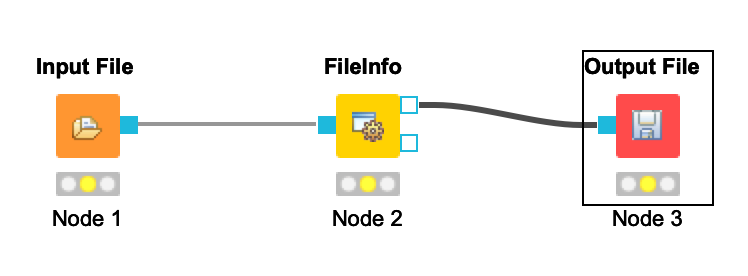
- Your workflow should be cleared of warnings and look like this:
5. Play the workflow.
- Click the Execute all executable nodes
 button in the toolbar at the top of the screen.
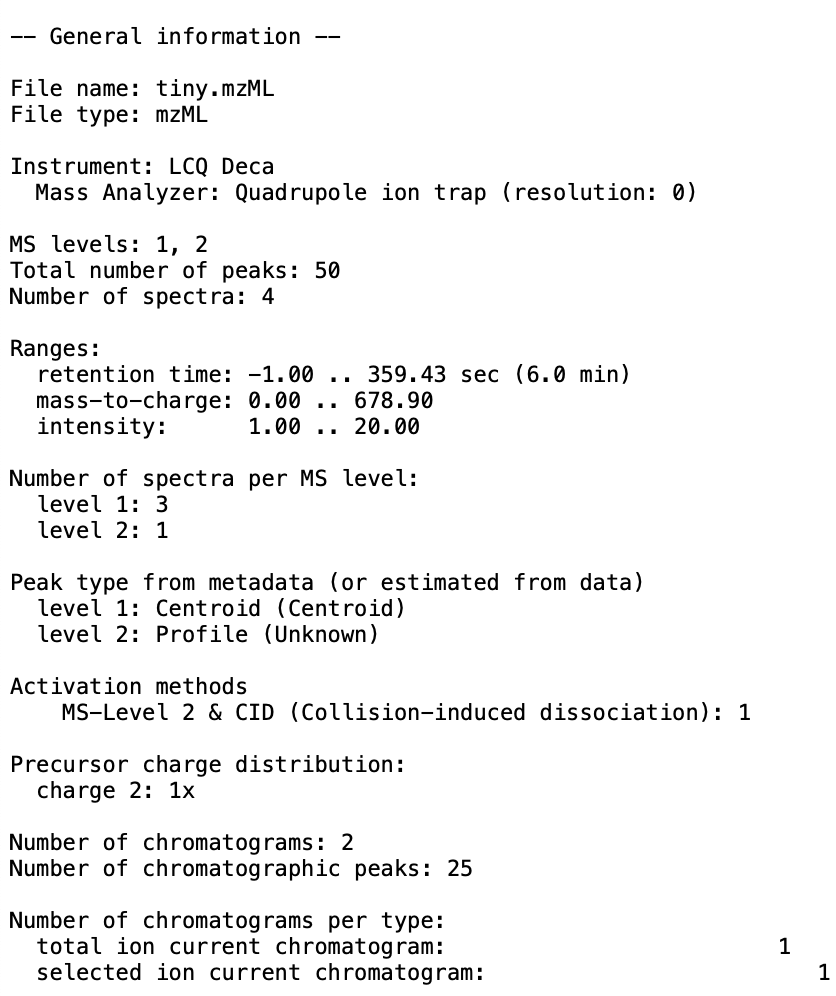
 - You should produce an output file at the specified location. Here is an example of what can be produced:
Running a Nextflow script#
Nextflow is a scripting language based on the Groovy programming language.
The following is a Nextflow script that executes the FileInfo TOPP tool on an input file.
params.input_file = 'path/to/input_file'

process runFileInfo {
  output:
    stdout

  """
  FileInfo -in ${params.input_file}
  """
}

workflow {
  runFileInfo | view { it }
}
The above script can be executed from the command line by entering:
nextflow run file_info.nf
You can also specify a file path from the command line by using:
nextflow run file_info.nf --input_file path/to/file